Running LLM and GenAI on Intel Arc GPU - Part 3
Make use of Intel Arc Series GPU to run Open WebUI with Ollama to interact with Large Language Models (LLM) and Generative AI (GenAI)
Introduction
In our previous posts, we explored the exciting possibilities of deploying Large Language Models (LLMs) on Intel-powered Linux PCs with Arc Graphics GPUs.
In Part 1, we outlined the process for installing Ollama and harnessing its potential in chatbot development.
In Part 2, we showcased the capabilities of Open Source Software in creating breathtaking visuals.
Building on this momentum, our next step is to simplify access to Ollama’s powerful features and unify the user experience. In this third installment, we’ll introduce Open WebUI as a more accessible entry point for interacting with Ollama, while also integrating image generation tools into this interface. This will enable users to seamlessly run LLM models and create stunning visuals from a single, intuitive web-based platform.
Source code
At this stage of our journey, it’s recommended to clone the GitHub repository that hosts the files associated to this blog. It will make the exercise more reliable. To do this, please run this command:
1
git clone https://github.com/eleiton/ollama-intel-arc.git --branch 3.1.0
Open WebUI
The process of running this tool within a Docker container is straightforward, as it doesn’t require specialized drivers or libraries to operate on Intel Arc GPUs. Moreover, since both Open WebUI and Ollama will be co-hosted, we can consolidate them into the same docker-compose.yml file as separate services.
Let’s have a look at the docker-compose.yml file from the GitHub repository you just cloned:
1
2
3
4
5
6
7
8
9
10
11
12
13
14
15
16
17
18
19
20
21
22
23
24
25
26
27
28
29
30
31
32
33
34
35
36
37
38
39
40
41
42
43
44
45
46
47
48
49
50
version: '3'
services:
  ollama-intel-arc:
    image: intelanalytics/ipex-llm-inference-cpp-xpu:latest
    container_name: ollama-intel-arc
    restart: unless-stopped
    devices:
      - /dev/dri:/dev/dri
    volumes:
      - ollama-volume:/root/.ollama
    ports:
      - 11434:11434
    environment:
      - no_proxy=localhost,127.0.0.1
      - OLLAMA_HOST=0.0.0.0
      - DEVICE=Arc
      - OLLAMA_INTEL_GPU=true
      - OLLAMA_NUM_GPU=999
      - ZES_ENABLE_SYSMAN=1
    command: sh -c 'mkdir -p /llm/ollama && cd /llm/ollama && init-ollama && exec ./ollama serve'

  open-webui:
    image: ghcr.io/open-webui/open-webui:latest
    container_name: open-webui
    volumes:
      - open-webui-volume:/app/backend/data
    depends_on:
      - ollama-intel-arc
    ports:
      - 3000:8080
    environment:
      - WEBUI_AUTH=False
      - ENABLE_OPENAI_API=False
      - ENABLE_OLLAMA_API=True
      - ENABLE_IMAGE_GENERATION=True
      - IMAGE_GENERATION_ENGINE=automatic1111
      - IMAGE_GENERATION_MODEL=dreamshaper_8
      - IMAGE_SIZE=400x400
      - IMAGE_STEPS=8
      - AUTOMATIC1111_BASE_URL=http://sdnext-ipex:7860/
      - AUTOMATIC1111_CFG_SCALE=2
      - AUTOMATIC1111_SAMPLER=DPM++ SDE
      - AUTOMATIC1111_SCHEDULER=Karras
    extra_hosts:
      - host.docker.internal:host-gateway
    restart: unless-stopped

volumes:
  ollama-volume: {}
  open-webui-volume: {}
As we’ve previously covered the ollama-intel-arc service, let’s now focus on the new addition: open-webui.
To ensure persistence across container restarts, we created a volume in the volumes section, specifically named open-webui-volume. This will store all application-related files, guaranteeing that they survive even in the event of a container shutdown.
In the depends_on section, we’ve established a dependency chain by requiring open-webui to start after ollama-intel-arc. This configuration tells Kubernetes to launch the ollama-intel-arc service before starting open-webui, ensuring that the services is online and available when open-webui is operational.
In the ports attribute, we’re exposing port 8080 from the container and mapping it to port 3000 on our host machine. Open WebUI natively starts on port 8080.
The most interesting part lies in the environment section. By default, we’ve set:
- WEBUI_AUTH to False for testing purposes, disabling authentication.
- ENABLE_OPENAI_API to False since we’re running locally and offline.
- ENABLE_OLLAMA_API to True using Ollama as our LLM provider.
- ENABLE_IMAGE_GENERATION to True to explore image creation.
The following settings are specific to SD.Next:
- IMAGE_GENERATION_ENGINE is set to automatic1111.
- IMAGE_GENERATION_MODEL defaults to dreamshaper_8, but any model can be used.
- IMAGE_SIZE is 400x400 for quick images; larger sizes require more memory and time.
- IMAGE_STEPS controls the denoising process steps (default: 8).
- AUTOMATIC1111_BASE_URL points to a container we’ll start, that will run SD.Next (http://sdnext-ipex:7860/).
- AUTOMATIC1111_CFG_SCALE defines the model’s adherence strength (2).
- AUTOMATIC1111_SAMPLER uses DPM++ SDE for noisy state refinement.
- AUTOMATIC1111_SCHEDULER employs Karras’ algorithm for denoising.
In our previous blog post we saw how to build and run SD.Next.
Let’s do that now from the GitHub repo we cloned, this will allow Open WebUI to see SD.Next and interact with it via its API.
1
podman compose -f docker-compose.sdnext.yml up
This time we don’t need to open SD.Next web page or use its UI, since we will be integrating Open WebUI to it via the API offered by the service.
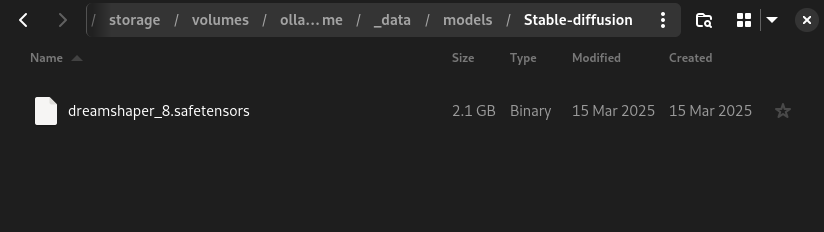
We do need to make sure there are stable diffusion models downloaded in SD.Next though.
Please check inside SD.Next’s sdnext-mnt-volume docker volume if you have models already:
1
ls -lah ~/.local/share/containers/storage/volumes/ollama-intel-arc_sdnext-mnt-volume/_data/models/Stable-diffusion
In this example we will be using dreamshaper_8.safetensors.
So go ahead, download it, and move it to the volume folder above to make it accessible.
Now start both Ollama and Open WebUI, which are accessible from the main docker-compose file:
1
podman compose up
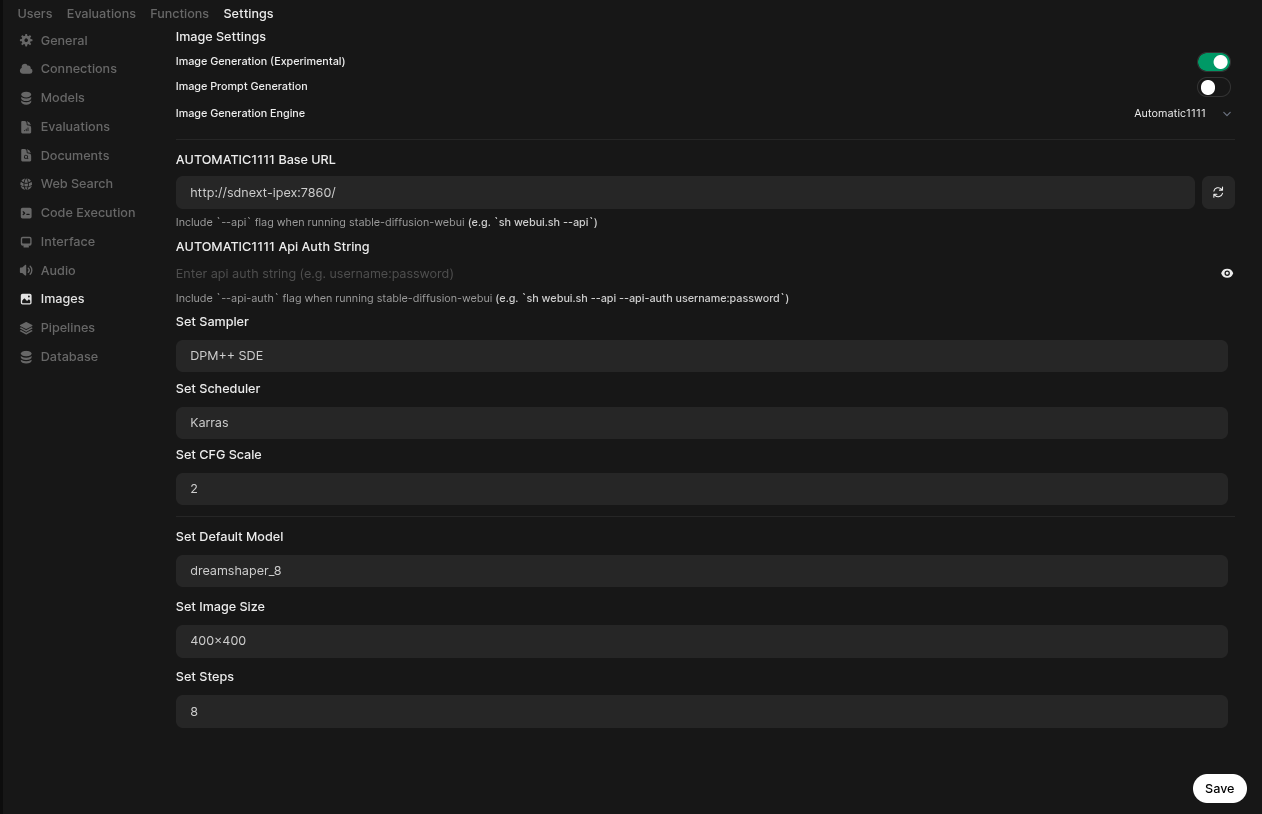
To access the Open WebUI settings, please navigate to http://localhost:3000/admin/settings. This will take you directly to the Open WebUI’s interface, where you can observe all the Image Generation environment variables we’ve configured in the docker-compose file. These variables are already applied in the Images setting.
If for some reason they’re not there, or if you want to change the default values, feel free to enter them manually.
Make sure to press the refresh button next to the AUTOMATIC1111 Base URL field. It will validate your integration with SD.Next is up and running.
Now we’re set and ready to use Open WebUI.
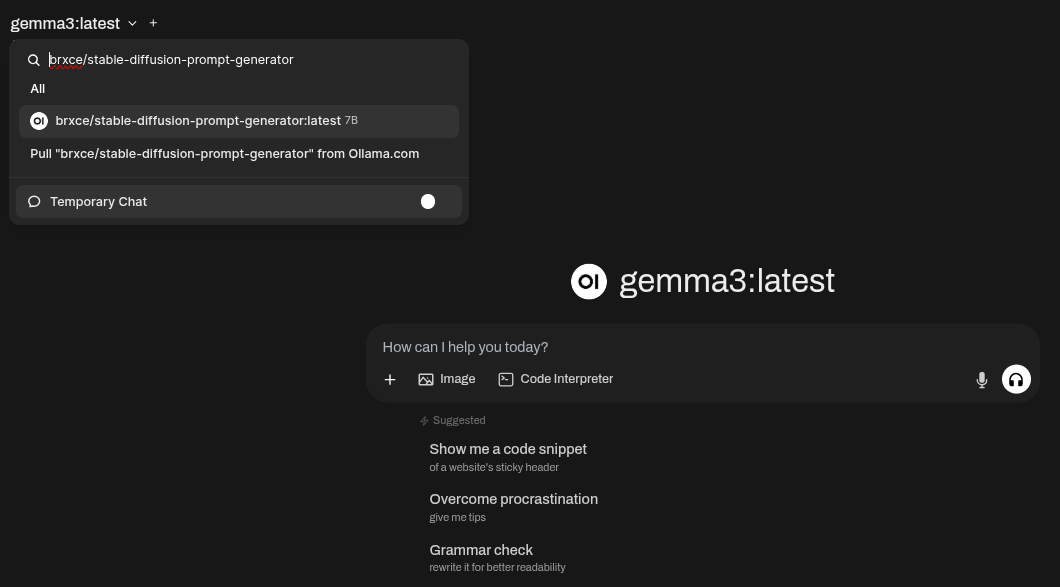
Our first step is to download and use a LLM model that can convert input text into a stable diffusion prompt, which can then be used to generate an image with a Stable Diffusion model.
Let’s use stable-diffusion-prompt-generator for this.
Go to the Open WebUI, select New Chat, and enter the name of the model in the box. It will allow you to pull the model automatically for you from Ollama.com:
To generate an image, you’ll need to provide a text prompt. The LLM model we just downloaded is now working on refining this prompt for you. It will analyze your input and suggest a more precise version – essentially, a tailored set of instructions designed to maximize the quality of the Stable Diffusion image generator. This process helps ensure you get the best possible results.
Let’s use the classic prompt example: a photo of an astronaut riding a horse on mars
Running this through our LLM model, we got out a more refined version of the prompt: 
Now all we have to do is click on the image icon below the response we got from the LLM, and this will trigger the image generation using the refined prompt. 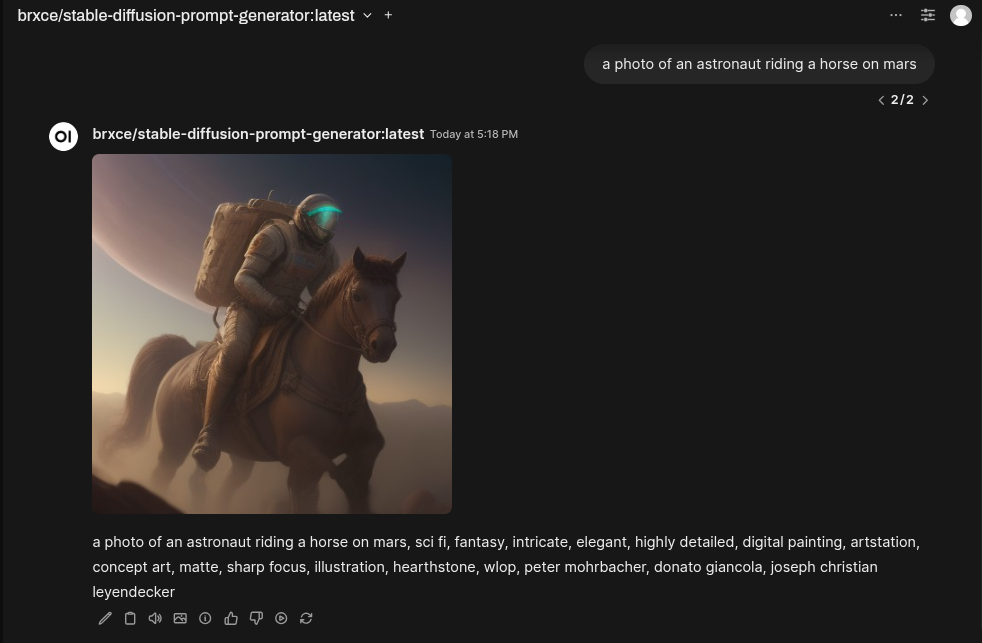
So, we’ve established the workflow: Open WebUI is connecting with Ollama to run the Stable Diffusion Prompt Generator model, and then it’s connecting to SD.Next for image generation. You can now explore a wide range of settings in Open WebUI and experiment with different models – this is a fantastic opportunity to deepen your GenAI journey.
For added flexibility, consider exploring ComfyUI, a great OpenSource solution that offers excellent integration with Open WebUI. Check out the docker-compose.comfyui.yml file located in the GitHub repository for more details.
Thanks for reading!